
Using GitHub Classroom
Lecture: Accepting a GitHub Classroom Lab
Lecture: Submitting a GitHub Classroom Lab
Your labs will be distributed and submitted using GitHub Classroom. Each lab will be housed in its own private repository (of which I remain administrator). There are three logistical steps associated with your labs:
Accept the lab to create your repository
Open your lab in VS Code
Submit your final version of the lab
Accept the lab
Find the assignment page for the lab on Canvas. Click the link indicated to accept your assignment.
Link your GitHub account to GitHub Classroom
The first time you accept an assignment, you’ll have to allow GitHub access to GitHub Classrooms and link your GitHub account to your username in the classroom.
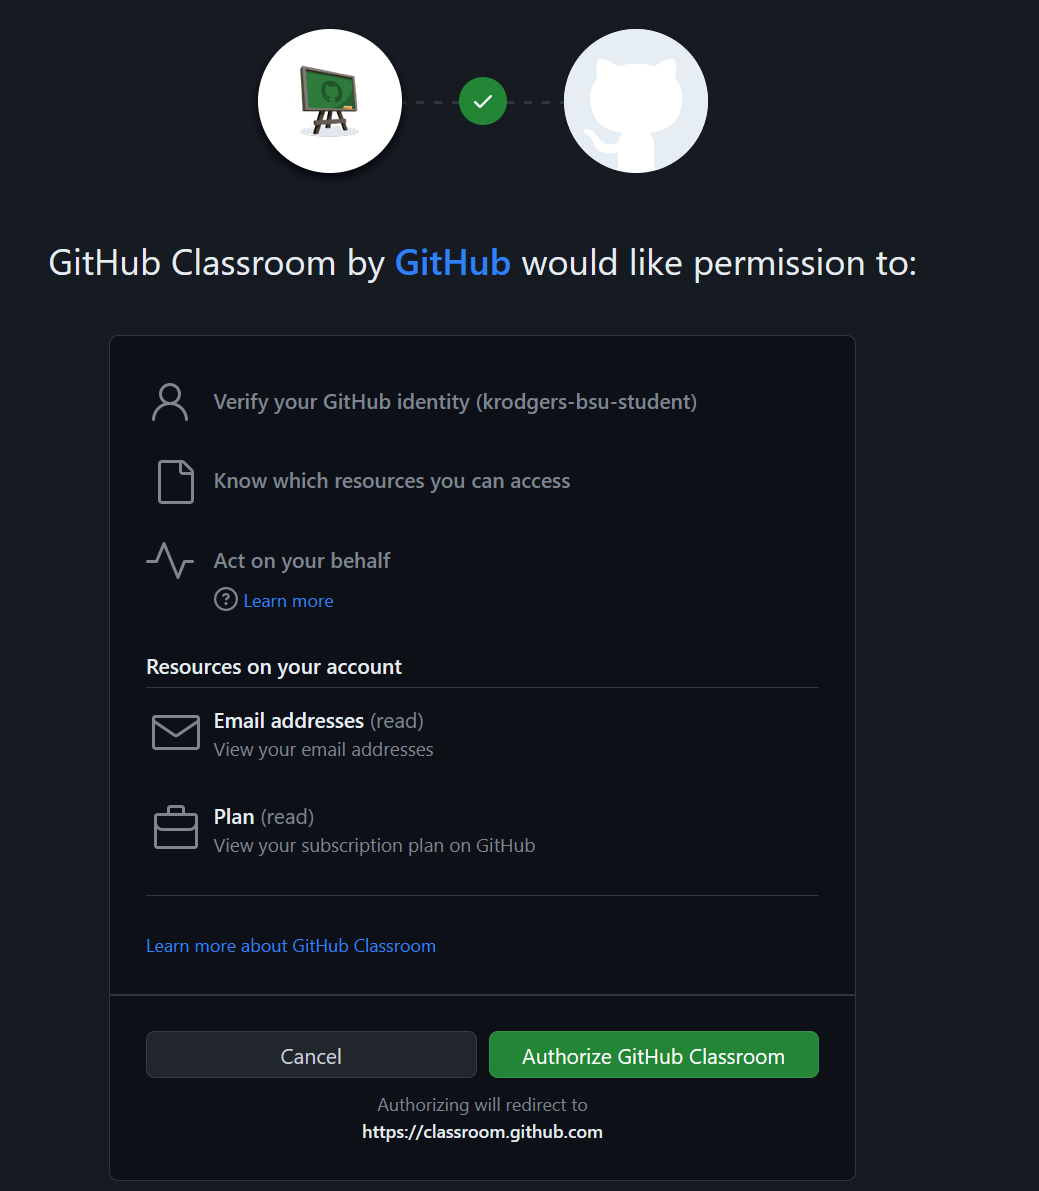
You should see something like the following when you first click the link. Authorize GitHub Classrooms by clicking the green button.
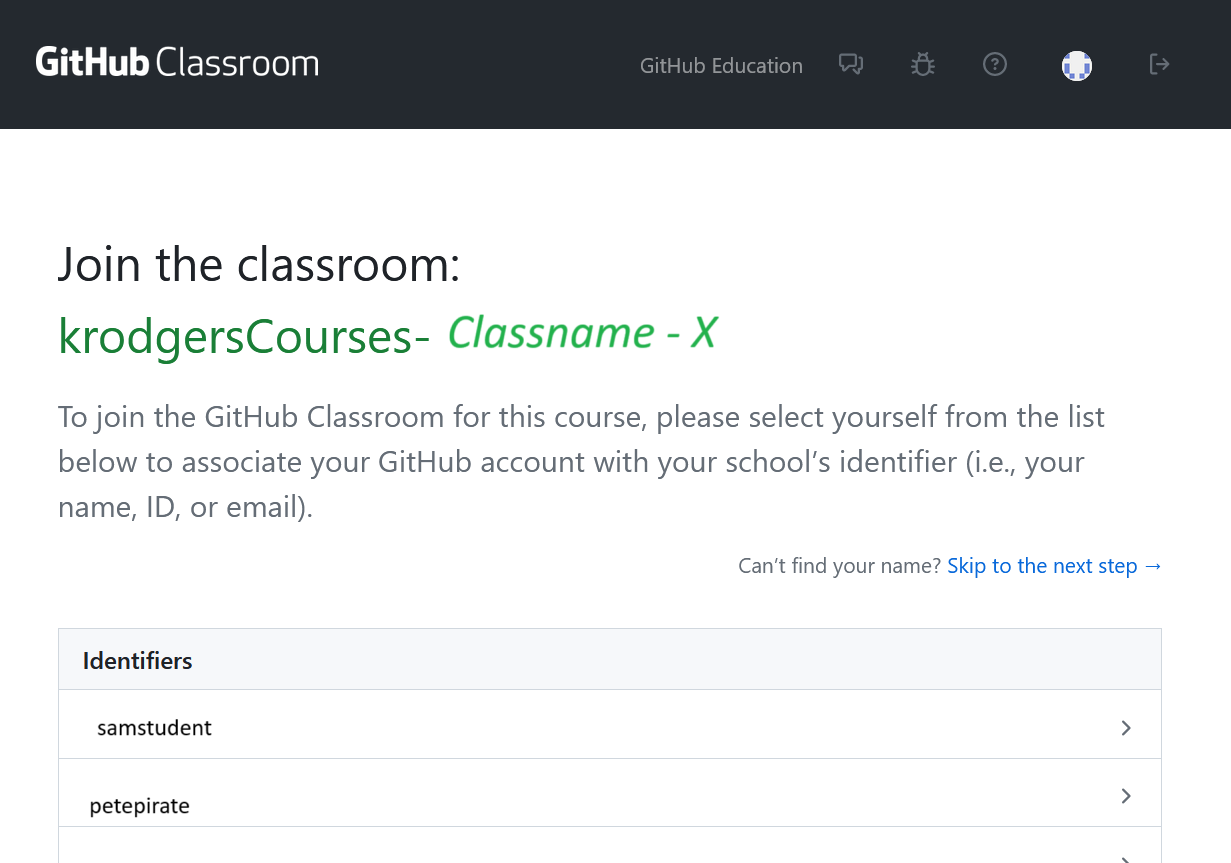
You then need to join the classroom. Find your username in the Identifiers list. If you don’t see your name, stop and contact me. When you find your name, click your name to go to the next step.
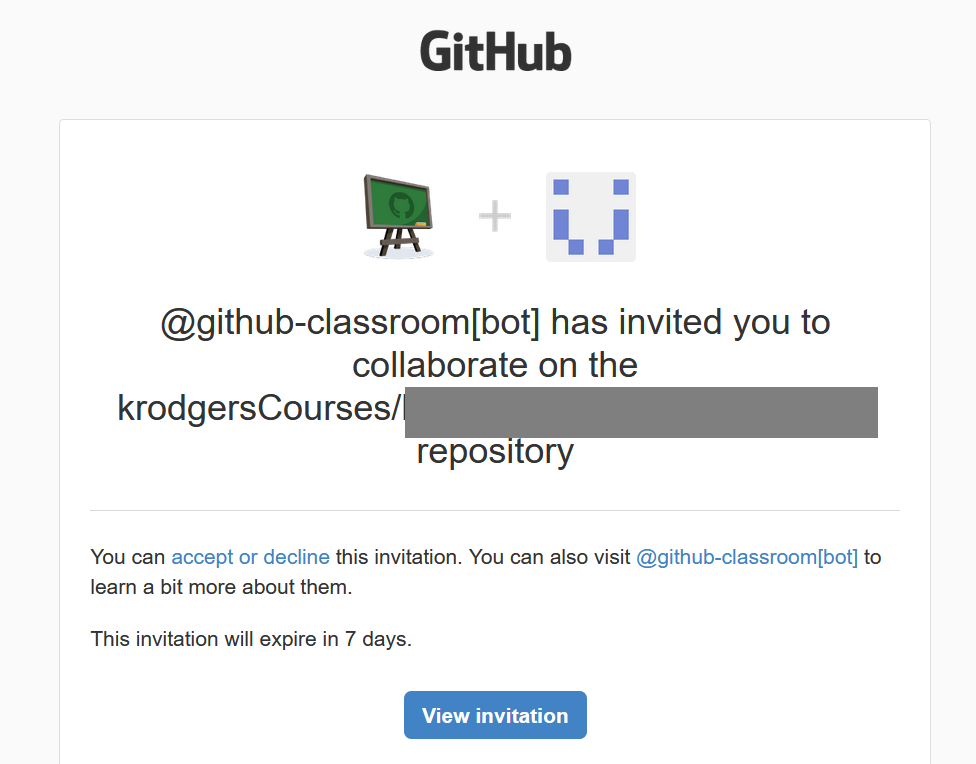
Keep an eye on your email for an invitation to GitHub Classrooms after you’ve linked your account. Make sure you accept the invite!!
Follow the instructions below to finish accepting your lab.
Accept A Lab
After you link your account, your account will stay linked. You’ll always need to sign into GitHub before you accept the lab. You should be taken to the Accept the Assignment page:
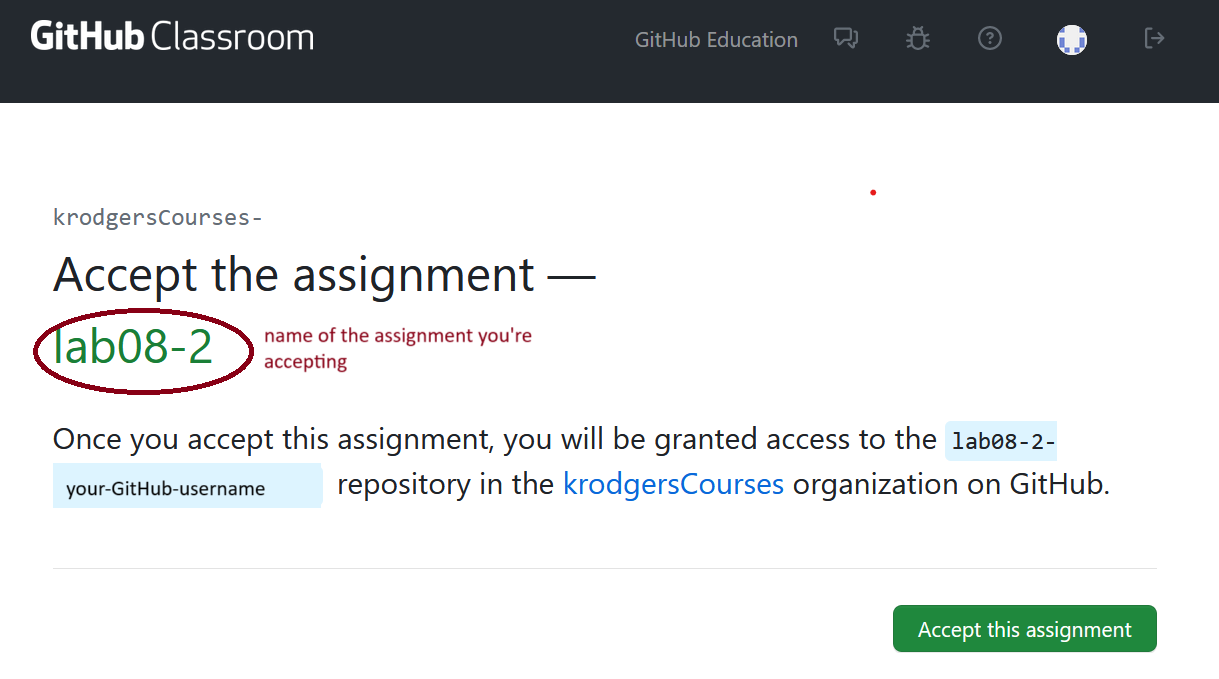
This page is just telling you that it’s creating a repository for you under my organization. Double check that the assignment listed is the assignment you intended to accept. Click “Accept this assignment”.
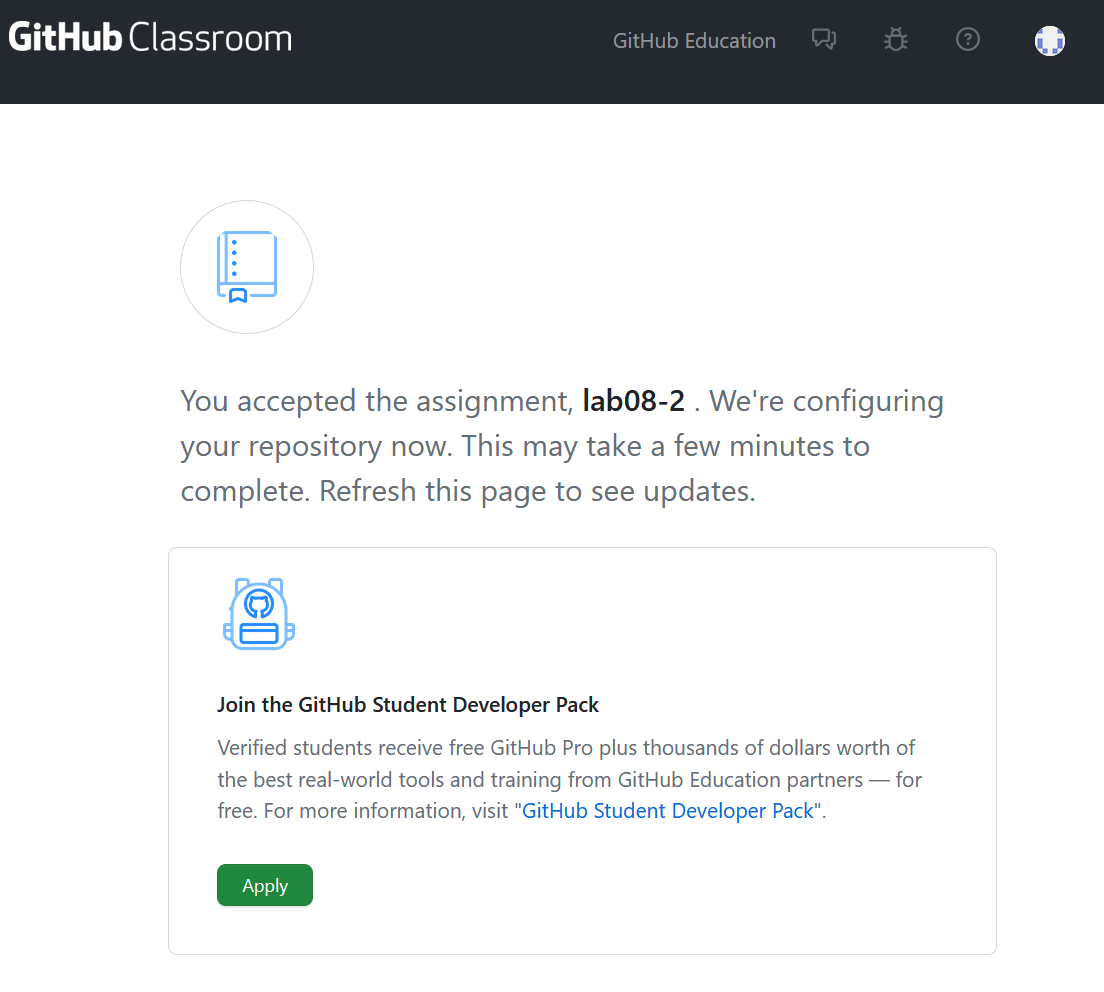
You’ll see a landing page. Give it a few seconds and then refresh the page.
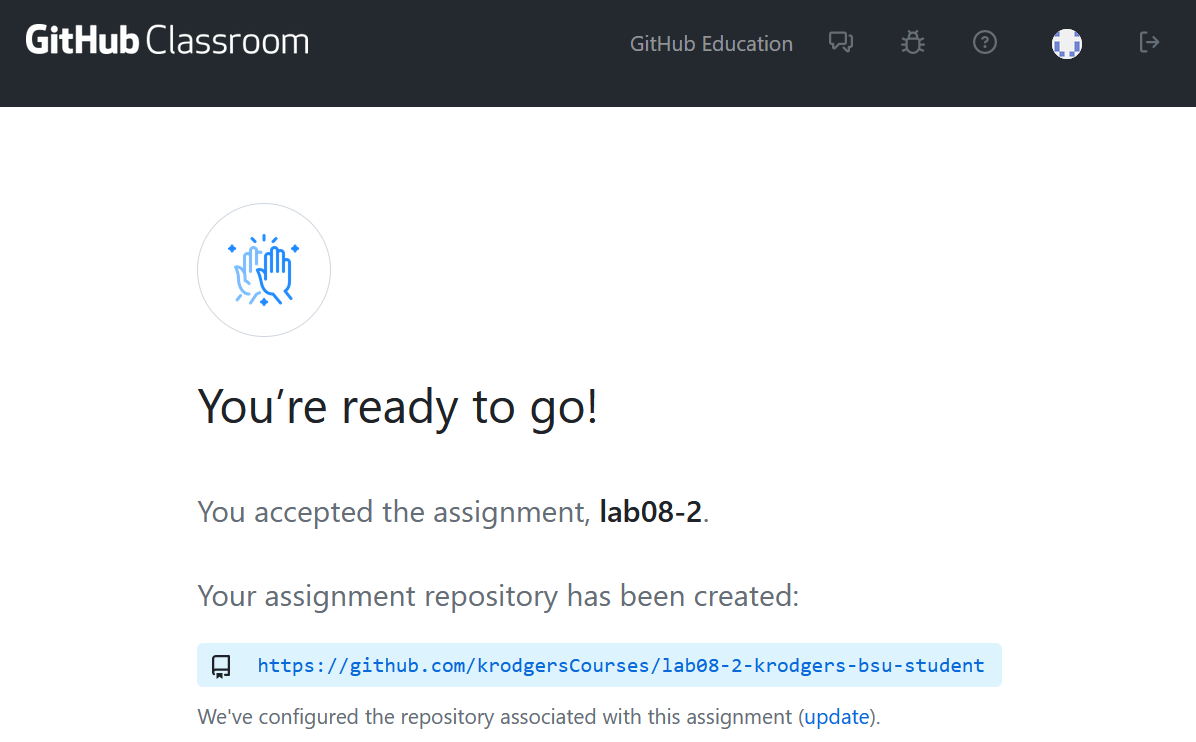
When it’s ready, it should tell you that the repository has been created. Don’t close this page just yet! You’ll need that URL (though you can always find your repositories directly from GitHub).
Open Your Lab in VS Code
After you’ve accepted the lab, it should have said that it had created a repository for your lab on GitHub. This repository (repo for short) belongs to only you (well, and me). Now you need to get the code off of GitHub and onto your computer. This is known as “cloning the repository”. There are several ways to do this.
One way is to use VS Code. Make sure you don’t have anything open in VS Code; close any folders or workspaces that you have open (File → Close Folder).
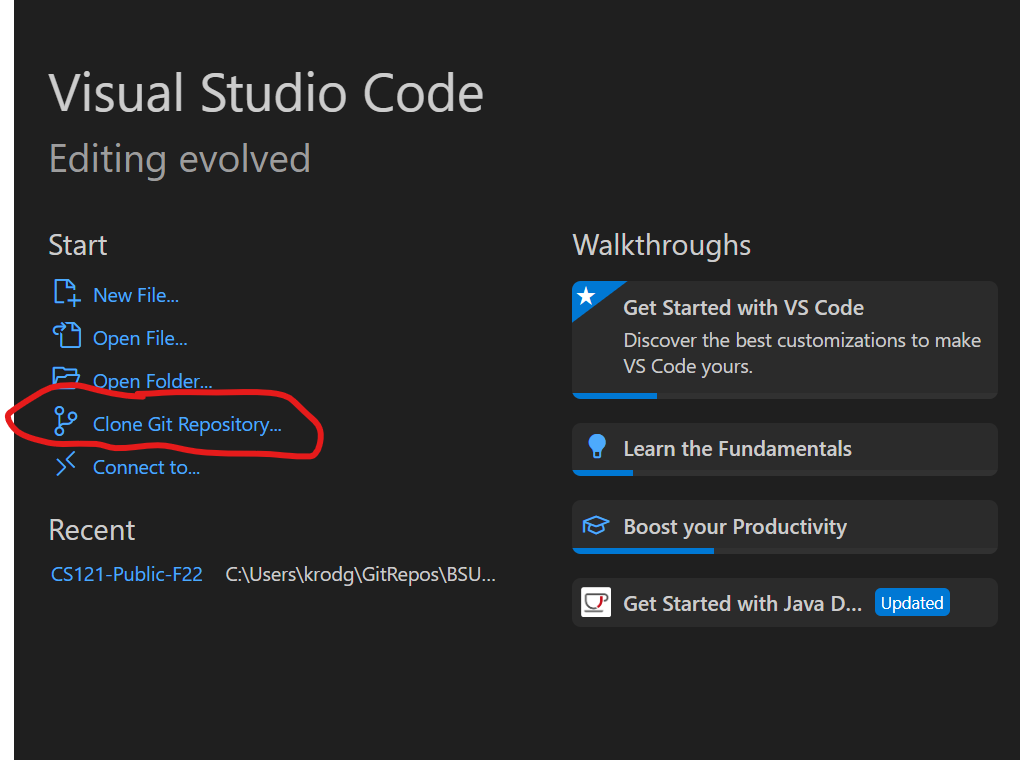
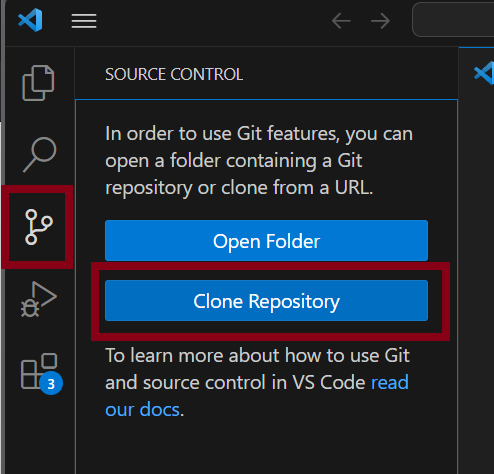
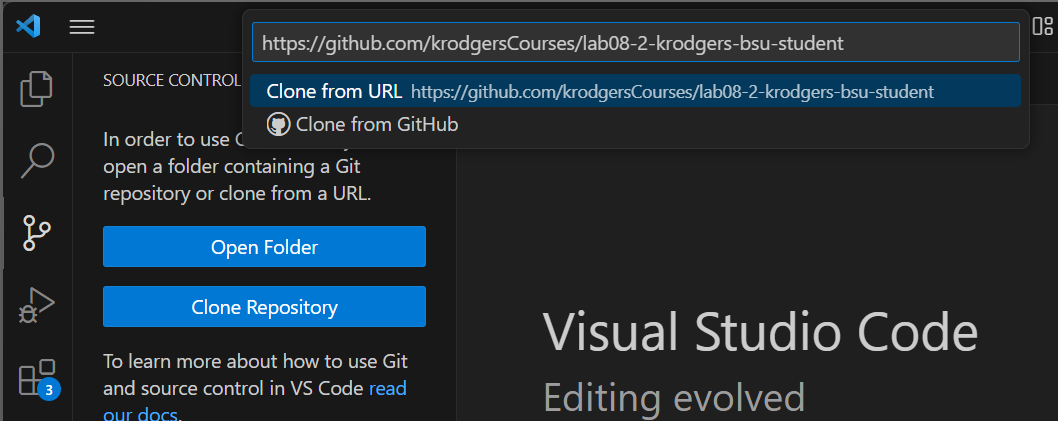
Click on “Clone Git Repository” from the welcome page or click on the source control button and then click Clone Repository.
A box will pop up for you to paste the repository URL. Copy the URL from the accepted assignment page. If you’ve already closed that window, you can open it again by clicking on the GitHub link in Canvas again (the same link you used to accept the assignment).
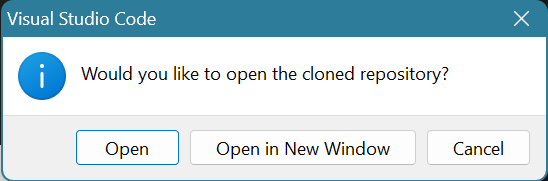
Hit Enter or click “Clone from URL: url address”. It will then ask where you want to store your files. Choose a file location that you’ll remember; choosing inside a folder just for this class is a good idea. It will say it’s cloning. When it’s done, it will ask if you want to open the repository. Yes! You do!
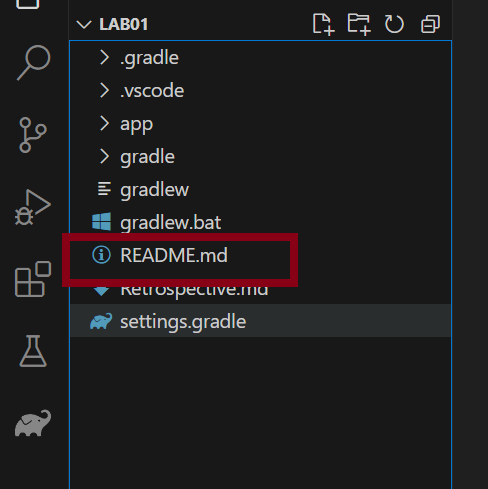
You should see your files in the Explorer Pane on the left hand side. Open README.md to see the lab’s instructions.
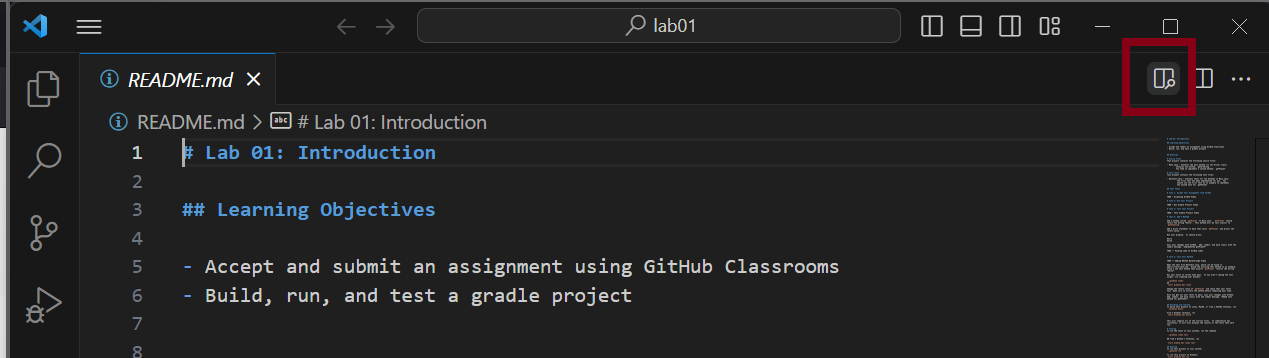
Click on the icon on the right with a magnifying glass to see the formatted version of the README.md file. The “.md” extension means the README is a “markdown” file; the file is written in something called “markdown” which specifies text formatting using symbols.
Follow the instructions in README.md to complete your lab.
Opening a Lab You’ve Already Cloned
You should clone your repo exactly once. Once you have the files on your computer, you can open them directly from your computer.
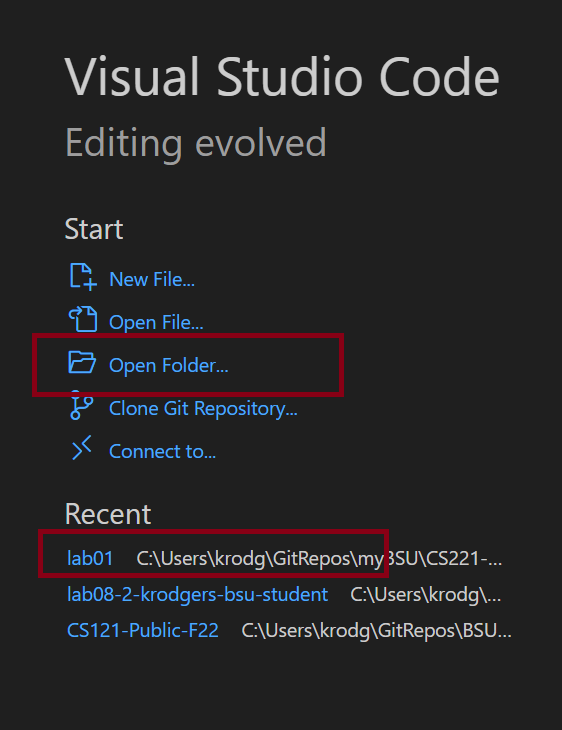
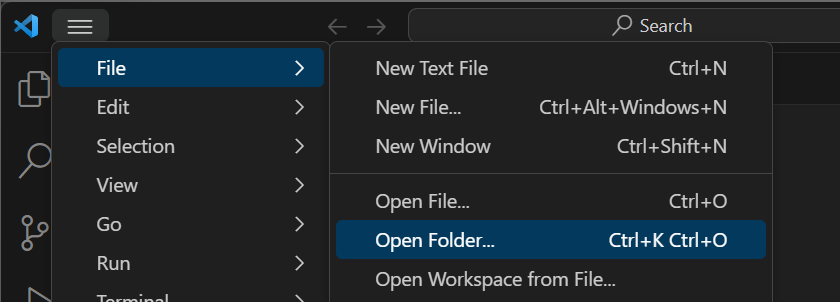
Always open the lab folder and not an individual file. In VS Code, you can open the folder from the list of recent folders displayed on the Welcome page, clicking open Folder on the Welcome page, or clicking File → Open Folder
If you’re opening the folder from the file system, choose the folder that contains all of your files. For example, if I’m trying to open Lab 1, I’d choose the lab01 folder. Click Select Folder to choose the folder.

After the folder opens you should see your files in the Explorer on the left in VS Code. It should show you README.md, the app folder, etc.
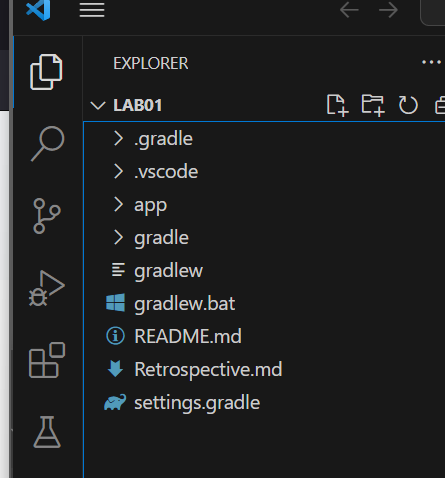
If you see source files, you’ve opened a folder inside the lab folder. Close that folder and open the top level lab folder.
Committing and Pushing Changes
After you’ve modified your files, you need to “push” those changes to GitHub so I can see the changes.
There are three steps: Stage, Commit, Push. Staging marks specific files to be included in the next commit. Committing is when you log your changes in your local version of the repo and where you add a message stating what you did to the files you modified. Pushing sends the changes to GitHub (and thus making the changes visible to me).
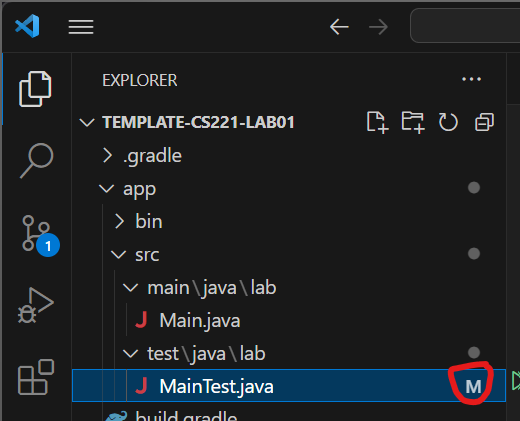
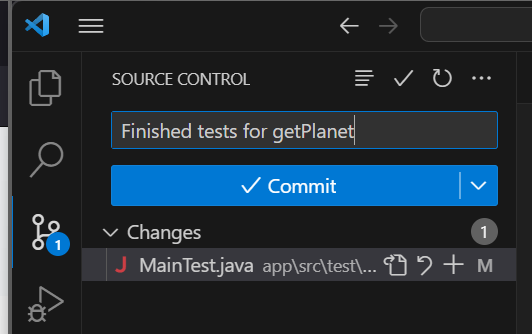
When you modify a file, VS Code will indicate that you have made changes. The number of files changed will appear in a bubble on the Source Control icon and an “M” will appear next to any files that you modified.
Click on the Source Control icon.
The text box at the top is where you type your commit message. Then you can see a list of the files that have been changed.
Type in your commit message and click Commit.

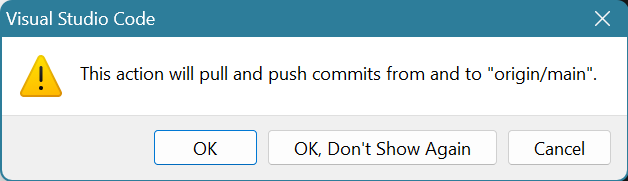
Lastly, you need to Sync your changes. Click Sync Changes.
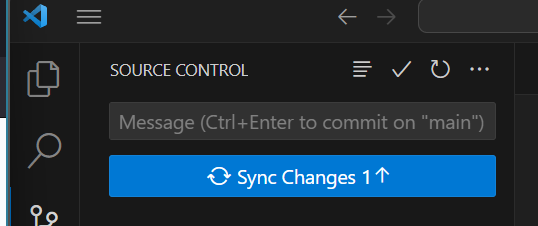
Yes, you want to pull (which checks for modifications on GitHub and updates your local files) and push (which pushes the changes you just made to GitHub).

That should do it!
Git From the Terminal
If for some reason, VS Code is having trouble with git, you can stage, commit, and push from the terminal.
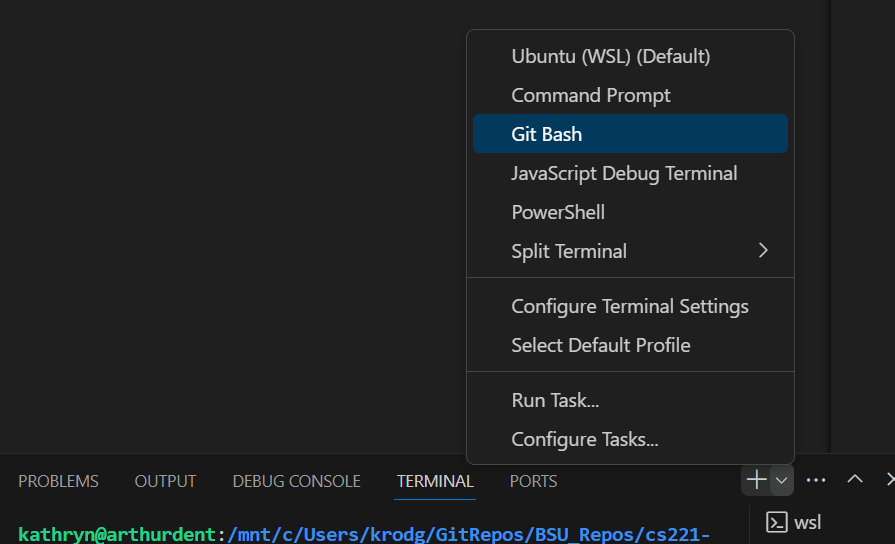
Open a new terminal. You can do this with File → Terminal → New Terminal OR push Ctrl+Shift+P to open the command bar and type “New Terminal”. Make sure you don’t open an external terminal.

You should be able to use the default terminal, but if your terminal is not recognizing git commands, open Git Bash.
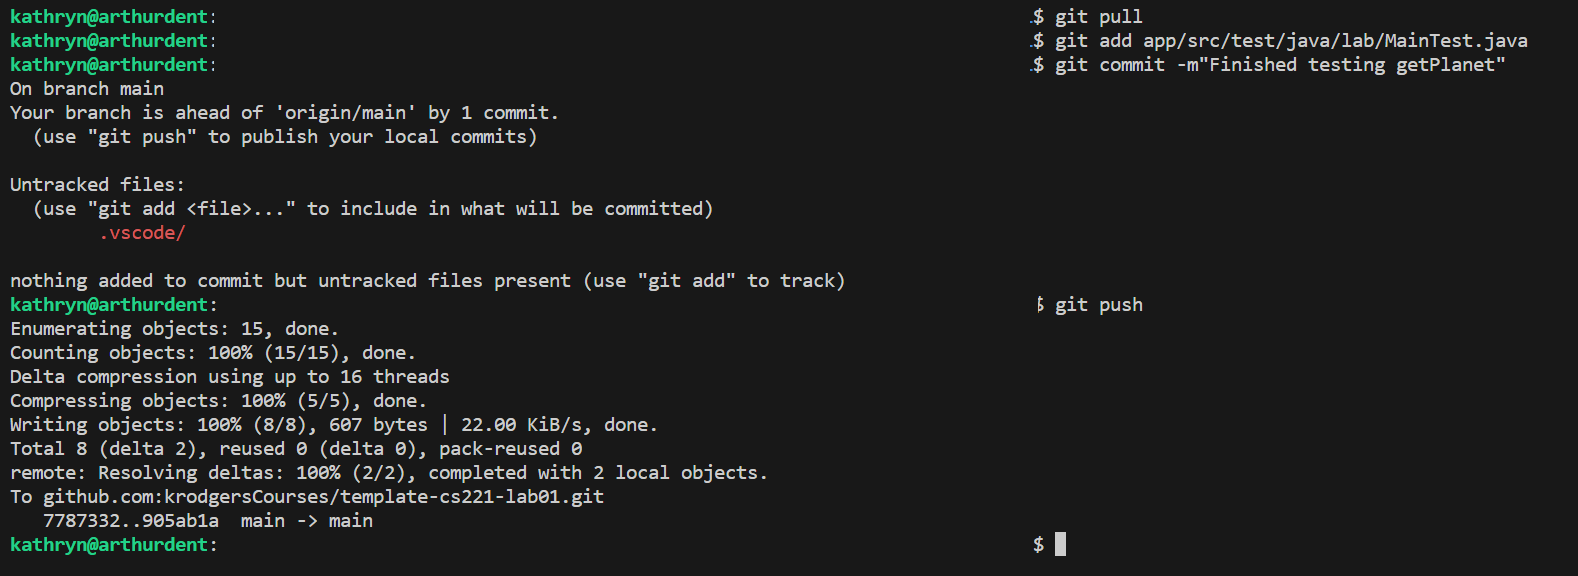
Execute git pull
Execute git add any-files-you-modified app/src/main/java/lab/ASourceFile.java
Execute git push
Make sure you add every single file that you modified. Git will show you what you modified but did not add under “Untracked files:”. You can ignore anything that starts with a period, but if you see any source files or your Retrospective listed, make sure you add those!
You’re done!
View Your Lab on GitHub
You can always double check that your files were added to GitHub successfully by viewing your repo on github.com.
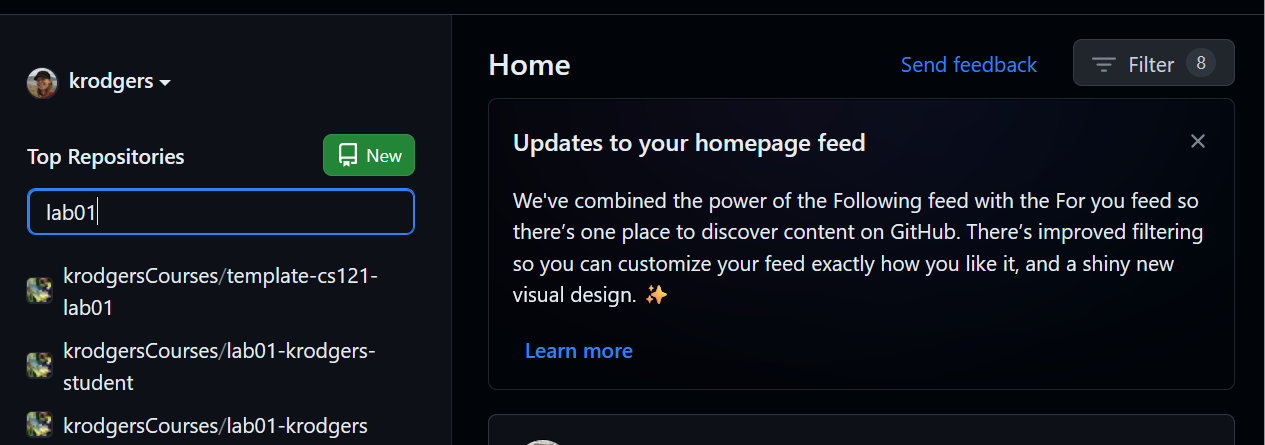
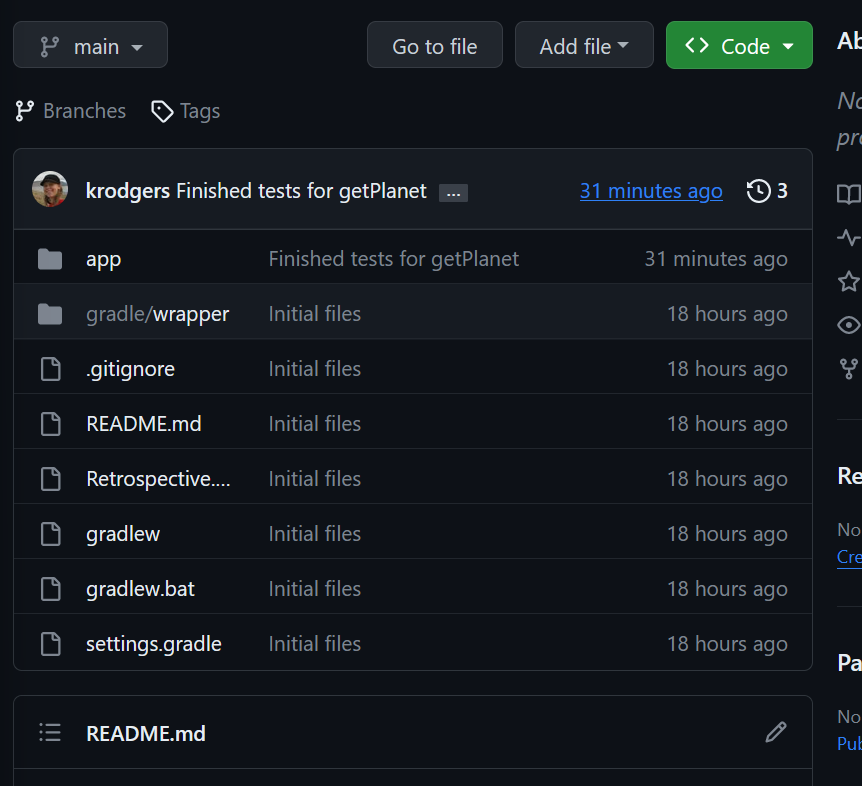
Go to github.com. Sign in if you’re not signed in already. You may see the repo for your lab listed on the right on the main page, but if not, you can search for the repository.
Click on the name of the repository. It will take you to your repository where you can see your code. You can see my latest commit is displayed at the top of the list of code. If that commit is not the latest commit you thought you made, then you probably didn’t push. Go back to VS Code, Sync your changes, and refresh the page.

What you see here is what I will see, so you can always verify that you’re submitting all of your changes.
Submit Your Final Submission
Fill out Retrospective.md
Open Retrospective.md and fill it out. Read through the instructions at the top and make sure you answer any Lab Questions (if there are any).
Stage, Commit, Push
Take one more look through README.md to make sure you’ve completed all of the tasks. Commit any remaining modified files (especially Retrospective.md).
Click on the Source Control icon.
Type in your commit message and click Commit.
Lastly, you need to Sync your changes. Click Sync Changes.

Yes, you want to pull (which checks for modifications on GitHub and updates your local files) and push (which pushes the changes you just made to GitHub).
That should do it!
Keep in mind that if you push any code after the due date, your lab will be considered submitted late. Unless you intend to submit the lab late, don’t push anything between the time you submit your final code and I grade your lab.
Verify Your Changes
You can always double check that your files were added to GitHub successfully by viewing your repo on github.com.
Go to github.com. Sign in if you’re not signed in already. You may see the repo for your lab listed on the right on the main page, but if not, you can search for the repository.

Click on the name of the repository. It will take you to your repository where you can see your code. You can see my latest commit is displayed at the top of the list of code. If that commit is not the latest commit you thought you made, then you probably didn’t push. Go back to VS Code, Sync your changes, and refresh the page.
What you see here is what I will see, so you can always verify that you’re correctly submitting all of your changes.
