
2 Microscopes and Cells
Introduction to Microscopy
Most things that we interact with during our daily lives are easily seen with the naked eye. However, biologists often deal with the smaller components that make up larger living organisms, or entire organisms that consist of only a single cell. For these objects, we need tools to help us out. Biologists use microscopes to see objects too small to see with just their eyes. There are two general types of microscopes: light microscopes and electron microscopes.
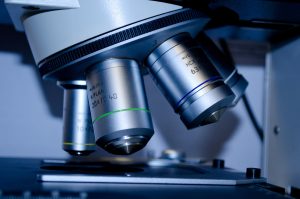
A light microscope shines light on or through a specimen and uses a set of lenses to magnify and focus the image. There are two general types of light microscopes: compound microscopes and dissecting microscopes. A compound microscope shines light through a specimen, which is usually mounted on a microscope slide. The light is focused through two sets of lenses (objectives and oculars) that magnify the image. Compound microscopes are especially useful for seeing the internal structure of specimens and are often used to see structures (e.g., organelles) within cells. Today we’ll be using a compound microscope in all of our exercises.
A dissecting microscope shines light on the surface of a specimen and produces a binocular (3D) image. Dissecting microscopes allow detailed examination of the outer surface of all or part of an organism and are usually of lower magnification power than compound microscopes.
Electron microscopes use electromagnets to focus a beam of electrons on a specimen. The electron beam has much smaller wavelengths than visible light photons and thus can produce an image with much higher magnification power and resolution. One disadvantage of electron microscopes is that specimens require detailed preparation and living organisms cannot be imaged. The first electron microscope was a transmission electron microscope (TEM). A TEM shines a beam of electrons through a specimen, analogous to a compound light microscope. The electrons are refracted as they pass through the specimen and the image is captured as the electrons emerge from the specimen. Another type of electron microscope is the scanning electron microscope (SEM). A SEM scans the surface of a specimen with an electron beam and the image is captured as the electrons are reflected, analogous to a dissecting light microscope. As technology advances, new microscopy techniques and tools continue to emerge.
Microscopy is an art and a skill. Light intensity, magnification power, and focusing all combine to create either a good clear image or a poorly detailed, blurry one. The only way to get good at using a microscope is to practice. The first part of this laboratory is focused on building skills with the microscope. We will concentrate on learning the parts and functions of the compound microscope while examining a variety of specimens. This exercise will allow us to examine the diversity of cells that make up living things and observe the amazing specialization that enables organisms to thrive in a variety of environments.
Diversity of Cells
One of the properties of life is that all life is cellular. That means that every living thing is composed of at least one cell. Some organisms are unicellular (e.g., bacteria, archaea, some protists), others are multicellular (e.g., plants, animals, fungi, some protists), and still others bridge the gap between unicellular and multicellular organisms by forming colonies (e.g., some protists). Whatever level of cellularity they display, all cells can be divided into two types: prokaryotes and eukaryotes.
Two domains comprise the prokaryotes: bacteria and archaea. Each of these domains contains a single kingdom, also called bacteria and archaea. Although there are biochemical and metabolic differences between these two groups, they share some common morphology. Prokaryotes are all unicellular organisms that lack a membrane-bound nucleus and membrane-bound structures (called organelles) within their cytoplasm. The prokaryotic chromosome is a single circular molecule of DNA suspended in the cytoplasm. Prokaryotes are also very small, even for cells; they are the smallest and simplest—but most abundant and diverse—organisms on earth. Prokaryotes have a cell wall to prevent bursting and provide rigidity, and have a plasma membrane to separate the cell from its environment.

We will focus on bacteria as our prokaryote examples. Bacteria may be classified by how they obtain energy, their shape, how they group together, or what physical structures they display. Bacteria are classified into three categories by shape: cocci are spherical, bacilli are rod-shaped, and spirilli are spirals. These bacteria can be further classified by how they group. For example, staphylococcus bacteria (which cause staph infections) are spherical bacteria that occur in clusters, while streptococcus (including the bacteria that cause strep throat) are spherical bacteria that form linear chains. Bacteria are extremely diverse. They may have one or more whip-like appendages called flagella (singular, flagellum) that are used to move; they may also lack flagella. They may have none, one, or many hair-like appendages called pili (singular, pilus) that can be used for anchoring to a surface.
Eukaryotes are much more complex. There are four kingdoms in domain Eukarya (also Eukaryota): Plantae, Animalia, Fungi, and Protista. The organisms within each kingdom have unique characteristics that define them; however, all eukaryotes also share certain morphology. Primarily, eukaryotic cells have a membrane-bound nucleus that houses their DNA. They also have other membrane-bound structures called organelles, which carry out specific functions within the cells. We will focus on plant and protist cells as our examples of eukaryotes in this lab.
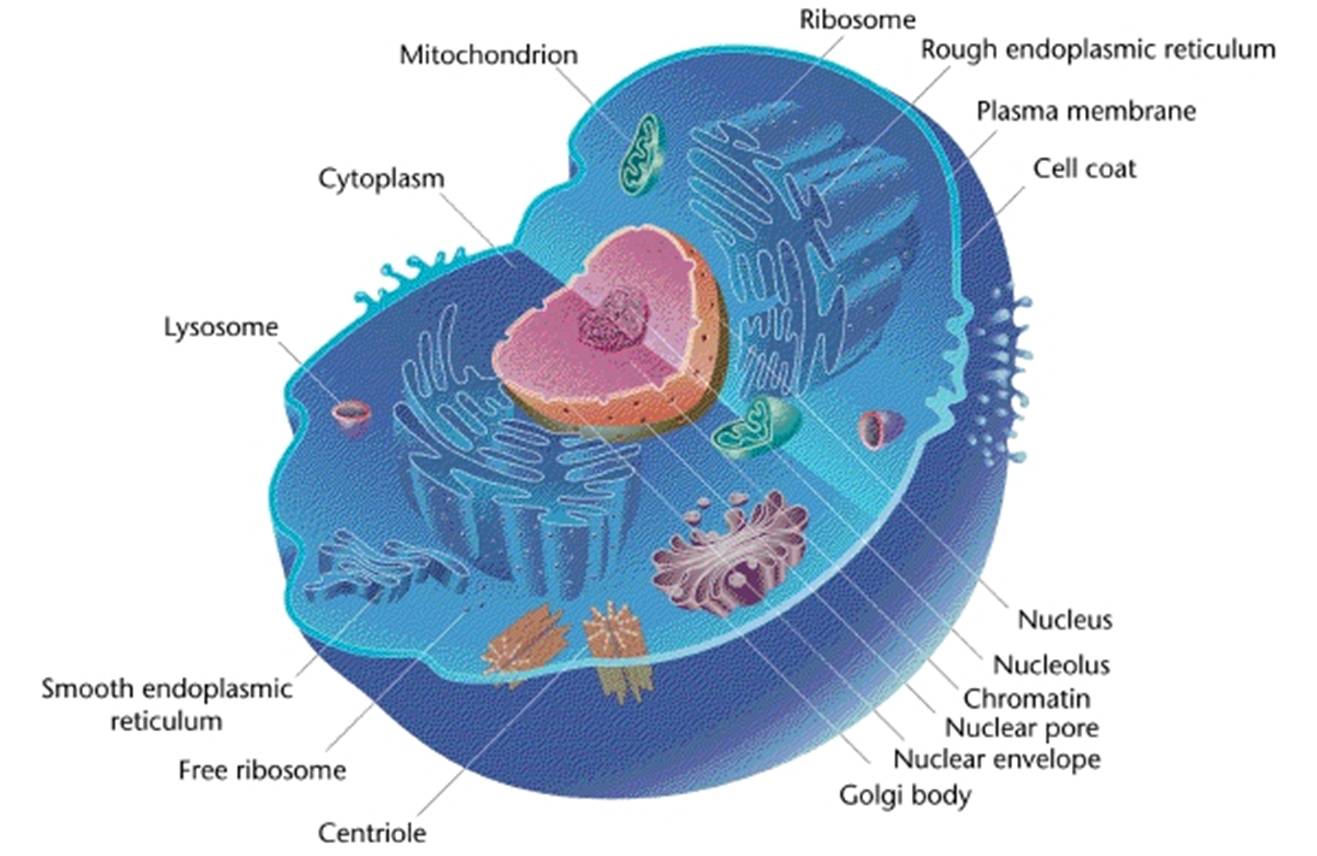
Plants are multicellular, photosynthetic eukaryotes whose cells produce cell walls composed of cellulose. Cellulose is a carbohydrate composed of cross-linked chains of glucose molecules, and it is difficult to break down. It is used primarily as a structural component in plant cell walls. Chloroplasts are possibly the most noticeable organelles in plant cells. These green, football shaped organelles carry out the processes involved in photosynthesis. Another unique organelle in plants is the central vacuole, which takes up and stores water and nutrients within the cell. Expansion of the central vacuole pushes the other organelles and the cytosol to the margins of the cell and exerts pressure against the cell wall. This pressure, called turgor pressure, helps a plant remain upright. Animals are also multicellular eukaryotes. However, animal cells lack chloroplasts and so are incapable of photosynthesis. Instead, animals must obtain energy by ingesting other organisms. Animal cells further differ from plants by lacking cell walls and a central vacuole. Although lacking these structures, they share the other characteristics common to all eukaryotes.
Some organisms consist entirely of a single cell. Most of these complex little critters are in the kingdom Protista. The protists are an incredibly diverse group of organisms whose only characteristic in common is that they are all eukaryotes that don’t fit into the other three kingdoms. Some are photosynthetic, others are heterotrophic (they eat other things). Some have flagella, others have cilia, some are unicellular, some are colonial (loose aggregation of cells), and others are multicellular. For this lab we will take a look at a few single-celled examples.
Microscope Handling and Use
Microscopes must be used and cared for properly to function correctly. Microscopes are very expensive and fragile. Today you’ll learn the basics of handling and using a microscope in order to avoid damage to these instruments. If you have experience with microscopes, help your less experienced teammates learn what you know.
Carrying the microscope
Retrieve a compound microscope from the cabinet in lab (your instructor will show you where) and bring it to your lab bench. Before removing the microscope from the cabinet, be sure the cord is not dangling or wrapped around any other microscopes. Use two hands to carry the microscope. Place one hand under it to support its weight, and hold onto the handle on the back of the microscope arm. If your microscope does not have a handle, hold tightly to the arm itself.
Cleaning the oculars and objective lenses
If your microscope lenses are dirty, then the view of your specimen will be obscured. Dirty lenses are often the cause when you just can’t seem to get a good, clear image. The lenses on a microscope are delicate and should only be cleaned using approved materials. These include lens paper or Kim-wipe laboratory wipes and either lens cleaner solution or ethanol. Wet a piece of lens paper or Kim-wipe with lens cleaner and gently wipe off the underneath side of each objective lens. Then do the same for the oculars. If you notice any coloration on your wipe afterward, the previous user did not clean the lenses properly. Always clean the lenses before and after you use a microscope.
Using a microscope to examine printed text
You’ll first examine a text slide to compare how the view in a compound microscope differs from our typical view of the world.
- Cut out a word from a piece of newspaper. Mount it on one side of a microscope slide by adding a small drop of “quieting solution” (methyl cellulose) to the slide and placing your text on it. Then place a cover slip over the text. You’ll use the other half of the slide for the next specimen.
- When using a compound microscope, you’ll put your specimen on a glass slide, and use slide clips to secure that slide on the stage. The stage is the large horizontal plate under the objective lenses that moves up and down when you turn the focus knobs. Mount your slide onto the stage using the slide clip. Our slide clips hold the slide like a pincer (like a crab claw). Open the slide clip by sliding the moveable arm outward; notice that it is spring-loaded. Place your prepared text slide between the clip and the clip frame, and then gently close the clip to hold the slide. Use the stage controls to position your text so that light will pass through it.
- Plug the power cord into the outlet on your bench top and find the power switch (on the side of the base). Turn on the light source, make sure it passes through your specimen, and then use the knurled knob located on the base to increase and decrease the light intensity. If the light doesn’t turn on, make sure the power cord is fully plugged into your scope.
- To see tiny details that you could never see with your eyes alone, you need to be able to focus the lenses. This is accomplished by rotating the two focusing knobs on the side of the microscope arm. Ensure that the low power objective is positioned over the specimen, then try turning the larger of the two knobs: the course focus. Notice that the stage moves up and down.
- When you turn the large knob, you may notice that the smaller knob turns faster. That’s because the smaller knob is the fine focus, and for each rotation, moves the stage less, allowing you to make fine adjustments to focus the image. Now turn the smaller knob and notice how slowly the stage moves. To view your text, use the course focus knob to find your image, and then use the fine focus to obtain a crisp view of your text. Once you perform initial focusing with the course focus knob, do not touch it again. ONLY the fine focus knob is needed to keep your view crisp as you move to higher magnifications.
Adjust the Image Brightness
When looking through the microscope, you may need to let more or less light through your specimen in order to clearly see the details. There are several parts of the microscope that function to adjust the image brightness. The light intensity knob is the obvious choice, but under the stage is the condenser, which you might not be familiar with. The condenser focuses the light shining through your specimen by way of the iris diaphragm. The iris is the opening through which light shines under the stage, and the diaphragm opens and closes the iris. Turn the knurled ring under the stage (on the condenser) and notice how the light shining through the stage changes.
Look at your text through the low power objective, then through the medium and high power objectives (don’t use the oil objective for this exercise). As you move to higher objectives, remember that you should ONLY adjust the fine focus knob. What happens to the brightness as magnification power increases? Why? Look at the lens diameter of each objective for your answer, and then adjust the iris diaphragm to shine more or less light on your slide. Practice adjusting the light level of your image using the low, medium, and high power objectives.
Magnification
The total magnification of the image you see when looking through a microscope is determined by multiplying the magnification of the ocular and objective lenses.
Magnification of each lens is usually marked on the side of the lens tube. Determine the magnification of the oculars on your microscope and also for each objective. Then determine the total magnification when using each objective.
Diameter of Field (view)
Diameter of field is the distance across the microscope viewing image when looking through the oculars. View a clear plastic ruler using the LOW power objective and estimate the diameter of the viewing image in millimeters (mm). Then convert the diameter to micrometers (1 mm = 1,000 μm) and enter the data in Table 2.2.
If you were to try to use your ruler to measure the diameter of field under the medium or high power objectives, chances are you would only see a very blurry splotch. The lines on the ruler are wider than the image diameter using the HIGH power objective. However, we can use the low power diameter of field (LPD) and total magnification to calculate the diameter of field of the medium (MPD), high power (HPD), and oil objectives.
Exploring Cell Diversity
You will examine several different types of cells and compare their structures and function. You can fit at least two specimens per slide. In each of your drawings, label the parts of cells that you see. Make sure that your captions include what the organism is, what magnification you are using, and label any cool stuff you see!
- Captions must include a descriptive title including the organism or object you are showing. “Figure 1. Elodea leaf viewed at 40X magnification.”
- Include a sentence or two to describe the important features of the image. These should describe something you observed and something you know from reading. Example: “Note the rigid cell walls,” or “Note the small hairs called cilia,” or “Does/does not have a nucleus.”
- Make sure your captions contain the total magnification you were viewing
Plant Leaf Cells
- Use one half of a slide to examine Elodea cells.
- Remove a single fresh leaf from the floating aquatic plant, Elodea. Choose a very thin leaf for the clearest image.
- Place the leaf on the slide along with a drop of water, and then cover with a coverslip.
- View the leaf under low, medium, and high power objectives, and then draw the cells in Figure 2.2, along with any organelles you can see. Be sure to label the chloroplasts, the cell membrane, and the cell wall.
Onion Epidermal Cells
- Use half of a slide to examine onion cells.
- Cut a small piece of onion and break it by bending it in half.
- Using forceps, peel the thin membrane from the outer surface of a layer of onion. This is the epidermis of the onion. Your specimen is the very thin, clear/white membrane that separates layers of the onion. Avoid using any brown parts of the onion.
- Flatten the epidermal specimen on your slide and add a single drop of methylene blue stain, and then cover with a coverslip.
- Press down gently on the coverslip to flatten your specimen.
- Observe the cells under your microscope and draw what you see in Figure 2.2. Be sure to label the structures you see.
Single-Celled Protists
- Use half of a slide to examine a protist: Place a drop from one of the protist cultures on the slide.
- Locate at least one organisms from your sample and draw it in Figure 2.3. If you can’t find one, try again, but add a drop of methylcellulose to prevent the movement of motile organisms.
Bacterial Diversity
- Obtain a prepared slide of bacteria. Clean your slide with lens cleaner. Find the area of your slide with dye: this is where your stained bacteria are located—examine the stained portion of your slide.
- Using the low power objective, locate the stained smears on your slide. To ensure you are seeing bacteria, after you have focused on your specimen, try moving your stage right to left with the stage control knob. You will see your specimen move as you move the stage if you have found bacteria. If not, keep looking by moving the stage up slowly.
- After you have focused on the smear with the low power objective, switch to the medium power objective and refocus using only the fine focus knob.
- Switch to the high power objective and refocus using only the fine focus knob.
- Turn the objectives so that you can access the slide and place one drop of immersion oil on the slide. Turn the nose-piece to lock the oil immersion (100X) lens in place. The oil will bridge the space between the slide and the objective. Do not rotate the 40X lens back onto your specimen: the oil damages this objective.
- Using only the fine focus, adjust the image and draw what you see in the first panel of Figure 2.4. Describe which internal and external structures are visible in the figure captions below.
- View the bacterial specimens from two more members of your group and draw them.
- When you are done using the oil immersion objective, clean the slide using lens cleaner, and dry it before returning it to the slide tray. DO NOT THROW THIS SLIDE IN THE TRASH! Clean the oil immersion lens using the lens paper and ethanol in the microscope cleaning kits.
Microscope storage
- Lower the stage of your microscope all the way down and leave the scope with the 10X objective in place. Storing your scope in this way prevents the lenses from getting scratched.
- Use a small piece of lens paper to ensure no oil remains on your 100X objective.
- Unplug the scope, wrap the cord neatly, and ensure the cord is not dangling.
- Use both hands to return the microscope to the cabinet. Make sure your microscope faces the same direction as the scope next to it in the cabinet.

.jpg)